
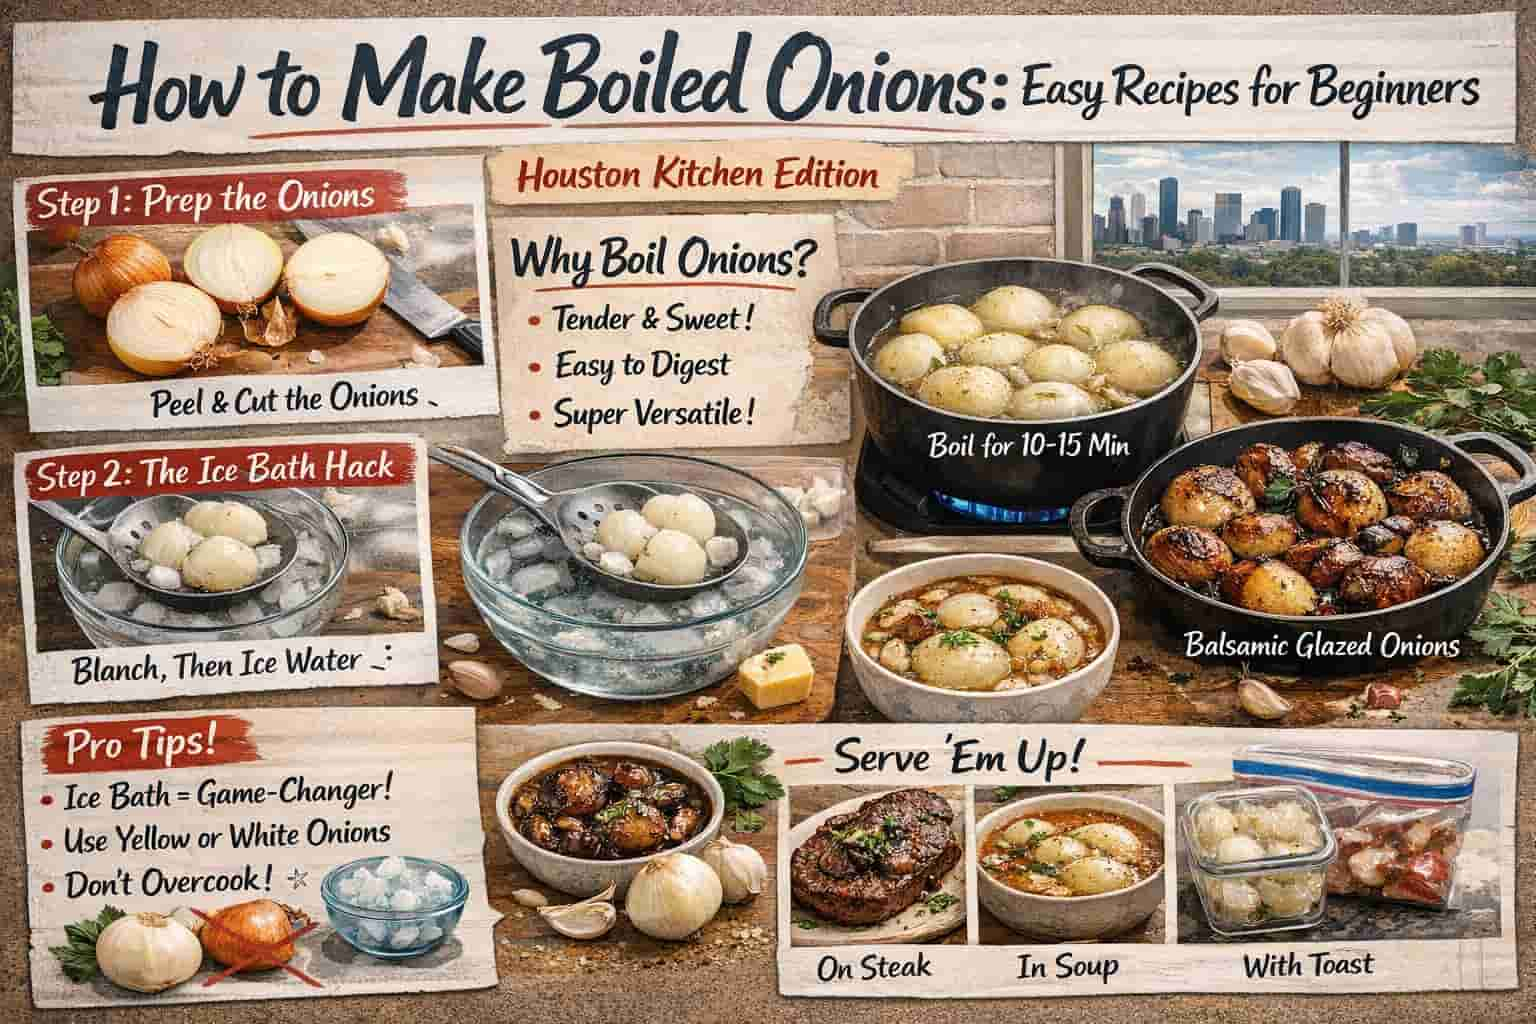
Look, I’ll be honest. here i am sharing to you How to Make Boiled Onions: Easy Recipes for Beginners The first time I tried to make boiled onions in my tiny Houston apartment, I turned my kitchen into a tear factory. Not cute. Not fun. And definitely not the vibe I was going for when I promised my friends a “fancy side dish” for Thanksgiving dinner.
Growing up in Hyderabad, onions were everywhere – piled high in chaotic pyramids at the local vegetable market, vendors shouting prices while aunties haggled like their lives depended on it. You’d grab a kilo, toss them in your cloth bag, and head home. Simple. Here in the US? I stood in the perfectly lit produce section of Whole Foods, staring at three different types of onions (yellow, white, and red?), completely paralyzed. Which one do I even boil?
That’s when I realized something: boiled onions aren’t rocket science. But they do need respect. And maybe some ice water. Game-changer alert coming your way.
Why Even Bother Boiling Onions?
Hold up. Before you roll your eyes.
Boiled onions are legit underrated. They’re sweet, tender, and way less aggressive than raw onions. Plus, they’re ridiculously versatile – you can toss them in stews, serve them as a side dish, or puree them for soups. My grandma used to make them with a little butter and black pepper, and honestly? Total comfort food.
Health bonus: Onions are packed with antioxidants, vitamin C, and fiber. Boiling them actually makes them easier to digest (your gut will thank you).
What You’ll Need
Here’s the thing. You don’t need fancy equipment.
Ingredients:
- 4-6 medium yellow onions (or white – they work too)
- Water (enough to cover the onions)
- 1 tablespoon salt
- Optional: 1 tablespoon butter, black pepper, or fresh herbs
Equipment:
- Large pot
- Sharp knife
- Cutting board
- Ice water bowl (trust me on this)
My Step-by-Step Method (That Actually Works)
Step 1: Prep the Onions
Peel those bad boys. Here’s my trick to avoid crying like you just watched The Notebook: chill your onions in the fridge for 30 minutes before cutting. Seriously. Heck yeah, it works.
Cut off the root end and the top. Then slice them in half or leave them whole – your call. I usually halve them because they cook faster and soak up flavors better.
Step 2: The Ice Bath Secret
Fill a bowl with ice water. Set it aside.
This is what I learned after my Houston kitchen disaster: blanching the onions first in boiling water, then shocking them in ice water, helps them keep their shape and removes that bitter edge. Total lifesaver.
Step 3: Boil ‘Em
Fill your pot with water. Add salt. Bring it to a rolling boil.
Drop in your onions. Let them cook for 10-15 minutes if halved, or 20-25 minutes if whole. You want them tender enough to pierce easily with a fork, but not falling apart like mush.
Pro tip: Don’t walk away. Check them at the 10-minute mark.
Step 4: The Ice Shock
Use a slotted spoon. Transfer onions to the ice bath. Let them hang out for 2-3 minutes.
This stops the cooking process immediately. Keeps them from getting soggy. Chef’s kiss.
Step 5: Drain and Season
Pull them out. Pat dry with a paper towel.
Now here’s where you get creative. I usually melt a little butter in a pan, toss the onions in, and hit them with black pepper and a pinch of salt. Sometimes I throw in fresh thyme if I’m feeling fancy. Other times? Just butter. Keep it simple.
How I Use Boiled Onions (And You Should Too)
In Soups: Puree them with vegetable stock. Instant creamy soup base.
As a Side: Serve them with roasted chicken or steak. The sweetness balances savory meat perfectly.
In Curries: Yeah, I still make Hyderabadi-style curries. Boiled onions add a mellow sweetness that raw onions just can’t match.
On Toast: Weird flex, but hear me out. Mash boiled onions with cream cheese, spread on toast, and top with everything bagel seasoning. Life. Changing.
Recipe 1: Buttery Herb Boiled Onions (The Fancy Version)
Okay, so you’ve mastered basic boiled onions. Now let’s level up.
This is what I make when I’m trying to impress my in-laws or when I need a side dish that looks like I spent hours in the kitchen. Spoiler alert: I didn’t.
Ingredients:
- 6 medium yellow onions, peeled and halved
- 6 cups water
- 1 tablespoon salt
- 3 tablespoons unsalted butter
- 2 cloves garlic, minced
- 1 teaspoon fresh thyme leaves (or ½ teaspoon dried)
- 1 teaspoon fresh rosemary, chopped
- ½ teaspoon black pepper
- 2 tablespoons fresh parsley, chopped
- Optional: ¼ cup grated Parmesan cheese
Preparation Steps:
Step 1: Boil the Onions Follow the same method as before. Boil salted water, add onion halves, cook for 12-15 minutes until tender. Ice bath shock. Drain and pat dry.
Step 2: Make the Herb Butter Here’s where magic happens. Melt butter in a large skillet over medium heat. Add minced garlic. Let it sizzle for 30 seconds. Your kitchen will smell amazing.
Step 3: Add the Herbs Toss in thyme and rosemary. Stir for another 30 seconds. Don’t let the garlic burn. Nobody likes bitter garlic.
Step 4: Toss the Onions Add your boiled onions to the skillet. Gently toss them in that buttery herb goodness. Cook for 3-4 minutes, letting them get slightly golden on the edges.
Step 5: Season and Serve Hit them with black pepper. Sprinkle fresh parsley on top. If you’re feeling extra (and honestly, why not?), add some Parmesan cheese.
Serve immediately. Watch people’s faces light up.
My Houston kitchen secret: I made this for a potluck once and three people asked for the recipe. I felt like a cooking goddess. It’s that good.
Recipe 2: Caramelized Boiled Onions with Balsamic Glaze (Sweet & Tangy Heaven)
This recipe happened by accident. Total happy mistake.
I was meal prepping on a Sunday, had leftover boiled onions, and spotted a bottle of balsamic vinegar in my pantry. Thought, “Why not?” And honestly? This might be my favorite way to eat onions now.
Ingredients:
- 5 medium yellow onions, peeled and quartered
- 6 cups water
- 1 tablespoon salt
- 2 tablespoons olive oil
- 2 tablespoons butter
- 3 tablespoons balsamic vinegar
- 1 tablespoon honey (or brown sugar)
- ½ teaspoon sea salt
- ¼ teaspoon black pepper
- Fresh basil leaves for garnish (optional but pretty)
Preparation Steps:
Step 1: Boil Your Onions Same drill. Boiling water, salt, onion quarters this time. Cook for 10-12 minutes. They should be tender but still hold their shape. Ice bath. Drain. You know the routine by now.
Step 2: Heat Your Pan Grab a large skillet. Add olive oil and butter. Medium-high heat. Wait until the butter stops foaming.
Step 3: Caramelize Time Add the boiled onion quarters. Don’t move them around too much. Let them sit for 3-4 minutes on one side. You want those beautiful golden-brown edges. Flip. Another 3-4 minutes.
Step 4: The Glaze Lower the heat to medium. Pour in balsamic vinegar and honey. Stir gently. The liquid will bubble and thicken. This takes about 2-3 minutes. Keep stirring so nothing burns.
Step 5: Final Touch Season with sea salt and black pepper. Toss everything together until the onions are glossy and coated in that sticky, sweet, tangy glaze.
Transfer to a serving plate. Tear some fresh basil on top if you have it.
Real talk: The first time I made this, I ate half the batch straight from the pan. Standing at my stove. No shame. It’s legitimately addictive.
How I serve it: Over creamy polenta. With grilled salmon. On crusty bread as bruschetta. Mixed into pasta. The possibilities are endless.
Common Mistakes I Made (So You Don’t Have To)
Mistake #1: Overcooking Mushy onions = sad onions. Check them early. Often.
Mistake #2: Skipping the Ice Bath I thought this step was extra. It’s not. It’s essential.
Mistake #3: Using the Wrong Onions Red onions get weirdly gray when boiled. Stick with yellow or white. Trust.
Mistake #4: Not Salting the Water Underseasoned onions are bland. Don’t be shy with the salt.
The Hyderabad vs. Houston Reality Check
Back home, boiled onions were never a “thing” on their own. We’d always use them in something – biryani, korma, dal. But here in the States, I’ve learned to appreciate them as a standalone dish. Americans love their simple, clean flavors. And honestly? There’s beauty in that.
At the same time, I can’t help but add my own spin. A little garam masala here. Some curry leaves there. It’s my way of bridging two worlds – the spice-loving girl from Hyderabad and the wellness-focused woman navigating Houston’s farmer’s markets.
Storage Tips (Because Meal Prep Is Real)
Fridge: Store boiled onions in an airtight container for up to 5 days.
Freezer: They freeze surprisingly well. Lay them flat in a freezer bag, squeeze out the air, and freeze for up to 3 months. Thaw in the fridge overnight before using.
Final Thoughts
Here’s the deal. Boiled onions aren’t flashy. They won’t make you Instagram-famous. But they’re practical, delicious, and stupid easy to make once you know the tricks.
The ice bath thing? Game-changer.
The chilled onions? Total tear-saver.
The butter finish? Chef’s kiss.
Whether you’re a homesick desi trying to recreate childhood flavors or just someone looking for a simple, healthy side dish, this method has your back. No drama. No fuss. Just perfectly tender, sweet, and versatile onions.
Now go forth and boil. And maybe grab some tissues. Just in case.
Heck yeah, you’ve got this. check ou my latest blog Cycle Syncing for Beginners: My Cringe Fails, Your Wins